Ready to draw your very own John Deere tractor? This isn't rocket science; it's easier than you think! We'll break this down so simply, even if you've never held a pencil, you'll be amazed at what you create. For more detailed instructions, check out this helpful guide: Drawing John Deere Tractors. Let's get started; remember – have fun! Perfection is overrated; we're aiming for awesome.
Getting Ready: Gather Your Art Supplies
Before we transform that blank page into a magnificent John Deere, let's gather our tools. You likely already have most of these!
- A piece of paper – any size works!
- A pencil – a #2 pencil is perfect. Sharpen it!
- An eraser – for those happy little accidents.
- Colored pencils, markers, or crayons – for vibrant color (John Deere green and yellow are classics!).
- A ruler (optional) – helpful for straight lines, but not essential.
- A picture of a John Deere tractor – use one online, in a book, or even a toy tractor as inspiration. Did you know there are over 60 different models of John Deere tractors?
Step-by-Step: Drawing Your John Deere Masterpiece
Let's start this artistic adventure! This isn't a race; each step builds upon the last. Enjoy the process!
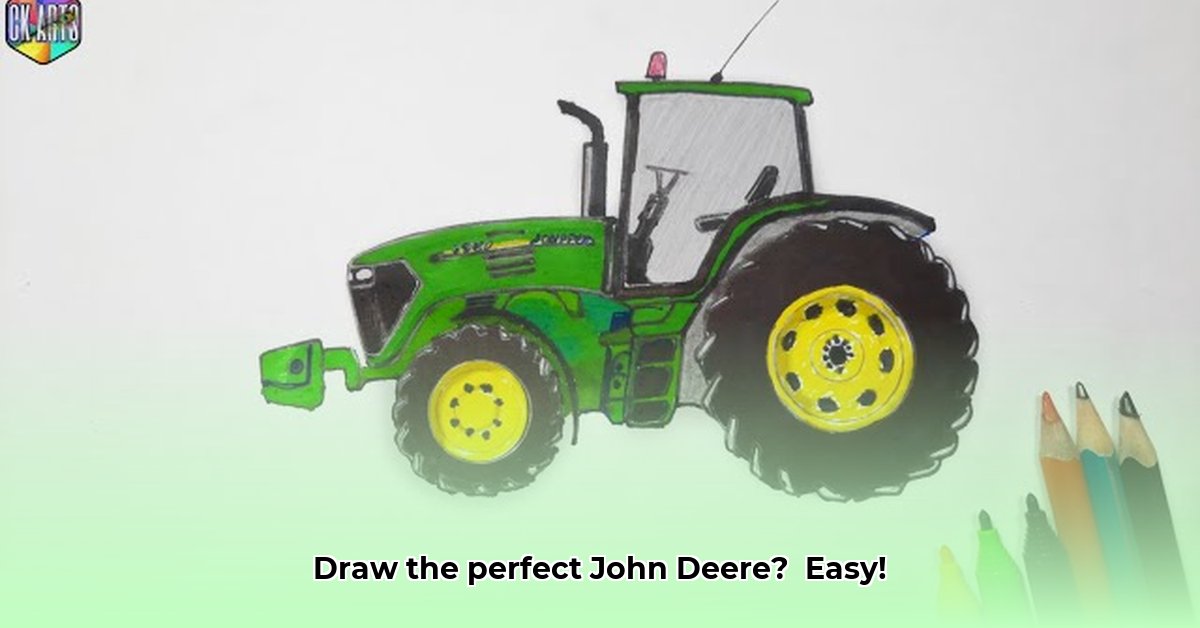
Basic Shapes (The Foundation): Begin by lightly sketching the tractor's main body using simple shapes. Think rectangles for the chassis, circles for the wheels, and maybe a trapezoid for the cabin. Don't press hard; these are just guidelines! Think of them as a blueprint for your artistic masterpiece!
Adding Detail (Building the Body): Now, let's add details to those basic shapes. Carefully draw the hood, fenders (those things over the wheels), and the exhaust pipe. Your reference picture is your best friend here!
Wheels and Tires (Rolling Along): Time for those powerful wheels! Pay attention to their size and placement. Don't forget the treads—those bumpy lines that help the tractor grip the ground! A little experimentation here can make your tractor unique. Isn't it amazing how much detail is in something as seemingly simple as a tractor tire?
The Driver's Cabin (The Driver's Seat): Next is the cabin. Draw the windows, the seat, and any details you see in your reference image. Think about the headlights and mirrors. Do you plan on drawing a driver in the cabin?
Finishing Touches (Little Details, Big Impact): Now for the fun part – the tiny details! Add headlights, a grille (that front part with lines), and any other unique features. Really study your reference; these small details make it realistic. Did you know that the design of the John Deere grill has evolved dramatically over the years?
Optional: Inking Your Lines: For a cleaner look, trace over your pencil lines with a pen or marker. Then, carefully erase your pencil marks.
Optional: The Coloring Stage: Now for the vibrant color! Use your colored pencils, markers, or paints to give your John Deere its iconic look. But hey, you're the artist – feel free to get creative!
Troubleshooting Common Drawing Challenges
It's completely normal to run into a few snags. Here's how to overcome them:
| Problem | Solution |
|---|---|
| Tractor looks lopsided | Check proportions using your ruler or reference image. Start again if needed! |
| Wheels seem off | Practice drawing circles. Break them down into smaller shapes. |
| It's too complicated | Take a breath. Return to basic shapes and add details slowly. Step back and look! |
Tips for Success: Making Your Tractor Amazing
- Patience is Key: Don't rush! Enjoy the journey.
- Light Pencil Strokes: Easier to erase and adjust.
- Reference Image is Your Guide: Keep it close by!
- Experimentation is Encouraged: Try different techniques!
- Have Fun! This is about creativity and self-expression. Relax, and enjoy the process.
Remember, this is your John Deere tractor, so let your personality shine through! You're not creating a perfect replica; you're creating art. So grab those pencils and let's create something incredible! You've got this!